Wednesday, June 28, 2006
Friday, June 16, 2006
Notes and files for collage available
Class notes for class 4 on creating a basic collage have been uploaded.
I am supplying the files for you to have a go at creating the postcard which appears in the previous entry.
cow.jpg
port.jpg
To download files right click the link and select Save Link As... or whichever command indicates that it will download or save the file to your hard disk.
Of course you may want to use your own files. Either way follow the steps in the Class 4 notes. Notes only go as far as we covered in class.
Please let me know of any errors or any thing that needs clarified.
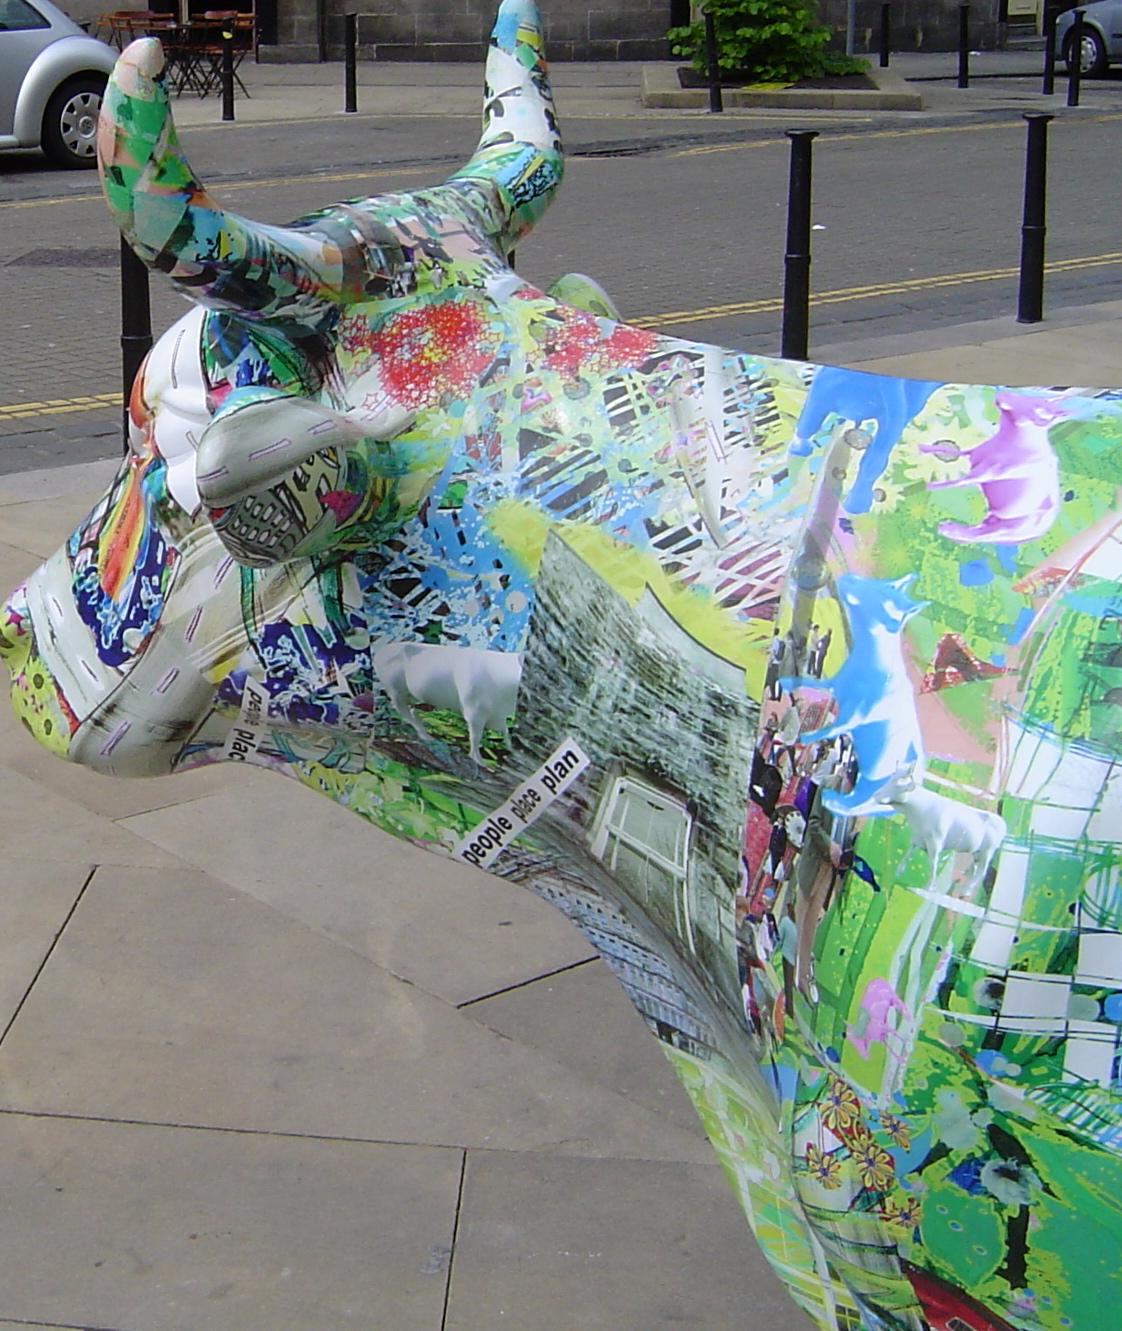
Basic collage

Here is my attempt at a basic collage combining a selection layer and a text layer, as per last night's lesson. Expanded notes on how to achieve this with your own photos to follow. The magnetic lasso (in full Photoshop) is fiddly but allows for more accuracy in making a selection.
Thursday, June 15, 2006
DVD-RW and DVD+RW
I mistakenly thought there was a similar division amongst CDs ie CD-RW and CD+RW but it seems there isn't.
What the distinction is between DVD-RW and DVD+RW is not clear but see the Wikipedia articles:
DVD-RW
DVD+RW
They seem to be competing formats. cdfreaks has an article from June 2003 Why DVD+R(W) is superior to DVD-R(W) (it's a bit technical:).
What the distinction is between DVD-RW and DVD+RW is not clear but see the Wikipedia articles:
DVD-RW
DVD+RW
They seem to be competing formats. cdfreaks has an article from June 2003 Why DVD+R(W) is superior to DVD-R(W) (it's a bit technical:).
Tuesday, June 06, 2006
Archiving your photos
Make sure that you store your photos in a logical manner on your computer. Organize your digital pictures has some suggestions.
Archive your photos fast suggests setting up a reminder to carry out archiving of photos on a regular basis.
The only point that I wish to make is the fairly obvious one that you only need to backup a set of photos once, ie you only need to backup the photos you've stored on your computer since your last backup. Hence the importance of organising your photos on your computer.
Scan resolution
Tom Ang (Digital Photography An Introduction DK) gives the following formula:
Suppose your original is 2 inches long and you want a print 10 inches. If you need an output resolution of 300 lpi (lines per inch) then you need
and the input resolution must be
The important thing is to know what the output resolution may be
input resolution = (size of output x output resolution)/size of orignal
Suppose your original is 2 inches long and you want a print 10 inches. If you need an output resolution of 300 lpi (lines per inch) then you need
10 x 300 pixels
and the input resolution must be
3000/2 = 1500 ppi (points per inch)
The important thing is to know what the output resolution may be
- inkjets between 80 and 200 lpi
- screen 72 dpi or 96 dpi
Saturday, June 03, 2006
I've been using the clone tool
I took this pic yesterday and only after I uploaded it did I notice the branches in the top left corner, rather spoiling the pic.
So this AM using Photoshop and the clone tool, in a job of a few minutes - branches gone:)
So this AM using Photoshop and the clone tool, in a job of a few minutes - branches gone:)
Thursday, June 01, 2006
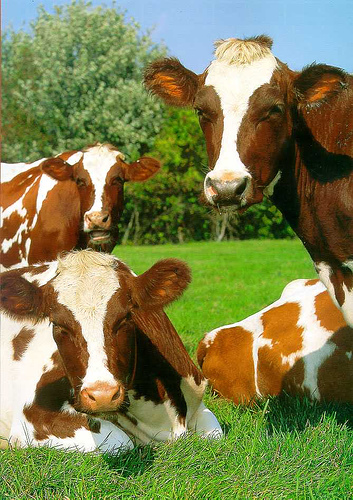
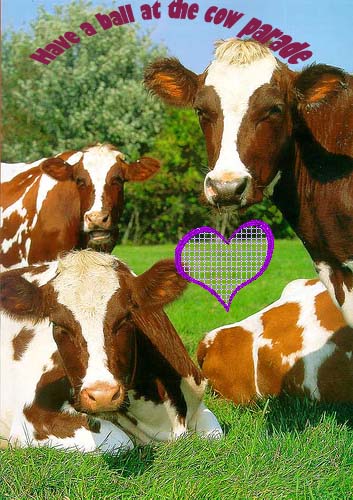
Files for Layers example
The Digicamhelp Layers introduction posted on Monday can help us see other uses for layers. I have provided two graphic files, a jpg and a transparent gif, to help get started with this mini tutorial.
heart - transparent gif
cow - jpeg
cow parade - my attempt at combining text and graphics
Download the first two of these files, and have a go at following the steps at the Layers introduction page. Play around with the type tool in Elements.
heart - transparent gif
cow - jpeg
cow parade - my attempt at combining text and graphics
Download the first two of these files, and have a go at following the steps at the Layers introduction page. Play around with the type tool in Elements.
Subscribe to:
Posts (Atom)
